Category Archives: food what gots booze in it

Apple-Pecan Upside Down Cake


Those who know me well know that while I am a pretty good cook, baking is simply not my forte.  I think it has to do with the fact that baking = precision and chemistry, whereas cooking is more freestyle and loose.  You can experiment a lot more during the cooking of a dish than you can during the baking of something–after all, have you ever been able to make adjustments mid-bake to a cake you put in the oven?

We are headed to my aunt’s tomorrow for a get-together of a few of my mom’s siblings (she has 12 that still survive of the original 15), and I offered to bring a dessert.  I wanted something that wasn’t traditional holiday fare, like pumpkin, apple or cherry pie.  I was inspired on a trip to Central Market last week by the gorgeous apple display they’ve got in the produce department–there are no fewer than a dozen varieties of apples there!–and decided I’d bake a cake using apples.  But what kind of cake to bake?  After a bit of thought, I decided I’d go the upside down route.  Furthermore, I decided I’d get crazy and bake it in the Dutch oven I’ve got.  The result:

A variation of the upside down cake with a bourbon-tinged glaze that uses tart Granny Smith apples to balance the sweetness of the cake.

Earlier in the week, I’d made one that didn’t turn out nearly as beautiful as this one, but that was equally delicious.  I took a few liberties with this recipe and made it my own.  Here’s how I did it.  You will need:

For the glaze:

  • 1/2 cup dark brown sugar
  • 2 tablespoons good bourbon (Knob Creek is what I used)
  • 1/4 cup Lyle’s Golden Syrup (I used this due to SB’s corn allergy; you may use corn syrup as Lyle’s is a specialty item)
  • 1/2 teaspoon ground cinnamon
  • 1/4 cup (1/2 stick) unsalted butter
  • 2 tablespoons thawed apple juice concentrate (or if you have the patience to make it, boiled cider)

Place all of the above ingredients into a microwave safe bowl and heat until the sugar is dissolved, about 2 minutes.

For the cake:

  • 2 1/4 cups all-purpose flour
  • 2 1/4 teaspoons baking soda
  • 1 teaspoon salt
  • 2 teaspoons ground cinnamon
  • 1 teaspoon freshly ground nutmeg
  • 1/2 cup (1 stick) unsalted butter
  • 1 cup white granulated sugar
  • 1 cup dark brown sugar
  • 3 eggs
  • 2 teaspoons vanilla extract
  • 2 tablespoons thawed apple juice concentrate
  • 1/4 cup good bourbon (I used Knob Creek)
  • 3 very large Granny Smith apples, peeled and cored (about 2 pounds)
  • 2 cups chopped pecans

Preheat your oven to 350 degrees F.  Grease the inside of a 5-quart Dutch oven (or use a sufficiently large cake pan, with at least 4″ walls) and line the interior of the pan with parchment paper.  Grease the parchment paper as well–nonstick cooking spray is excellent for this purpose.

Peel and core one of the apples and slice it horizontally into 1/4″ slices so that the apple slices come off as rings.  Layer the apple rings in the bottom of the greased parchment in two layers that overlap one another (you can see this in the finished cake above).  Pour the glaze over the apple slices and allow this to sit while you make the batter.

Peel, core and grate the remaining apples and reserve in a bowl.  Set aside.  They will turn brown, but no worries since you will be folding them into the batter later.

Place your flour, salt, baking soda, and spices into a mixing bowl and sift them together, setting this aside.  In a large mixing bowl, cream the butter and sugars until fluffy.  Beat in the bourbon and vanilla, and then add the eggs one at a time.  Slowly beat in the flour mixture until it is fully incorporated with the sugar and eggs.  Finally, fold in the shredded apples.

Pour the batter into the pan containing the apples and glaze.  Cover the top of the batter with the pecans, taking care to evenly distribute them across the surface of the batter.  Bake for 70 minutes or until a wooden pick inserted into the center comes out clean.

Once done, allow the cake to cool in the pan for about 30 minutes.   Here’s where the removal gets a bit dicey.  I’ll tell you what I did to get it out of the pan, but feel free to remove it however you see fit.

I had two plates at the ready–one for serving, and one to hold the cake while I inverted it.  I pulled the cake out of the Dutch oven using the parchment paper and carefully laid it on one plate (not the serving platter).  I very carefully peeled the parchment from the perimeter of the cake, which took little effort since I sprayed the paper down with nonstick cooking spray.  Then I laid the serving platter upside down onto what is the bottom surface of the cake (pecan side) and carefully turned the cake over onto the serving platter and slowly removed the parchment so that I wouldn’t lose any apples from the top surface of the cake.

Now, I haven’t eaten a piece of this one but based on the one I made earlier in the week, I can tell you it is sweet and really needs either whipped cream or vanilla ice cream to temper it.  It is a moist cake, owing to the shredded apples throughout, and is just plain GOOD.

Brisket Tacos and Borracho Beans


I hope everyone had a fantastic 4th of July.  Ours was really low-key:  we got up super early, went for a walk at a local park, came home and were like slugs all day.  I napped, but before I napped, I put a brisket in the oven for us to have for dinner last night.  After all, it was the 4th of July, and well, brisket is holiday food.  At least it is to me.

Anyway…we had a substantial bit of brisket left over, because well, you can’t buy a brisket for 2.  You can get pretty close, but it’s tough.  Thankfully, the butcher I shop at had smaller cuts of brisket and I was able to get a brisket that was a bit under 6 pounds.  I didn’t really do anything special to it:  just poured a couple of Mexican Cokes (no corn syrup) into a 9-quart Dutch oven, rubbed the brisket down with some rub I have, and placed the meat in, fat side up.  I put the lid on it, put it into a 250F oven and let it cook from 9 until 5 that evening.

The result was a super moist, fork-tender brisket.  In lieu of a smoker, this is how I’m going to cook brisket from now on.

Anyway…since we had so much leftover brisket, I decided that we’d have brisket tacos for dinner tonight, which turned out to be a brilliant idea:

Got leftover 4th of July brisket? We did. Here's what we did with it...mmm, brisket tacos! Almost like barbacoa, but a bit less fatty and just as tasty!

I served them on whole wheat tortillas, along with a bit of shredded Chihuahua cheese and lime wedges.  The avocados we had were not quite ripe enough, or I’d have sliced them up and stuffed the tacos with them.

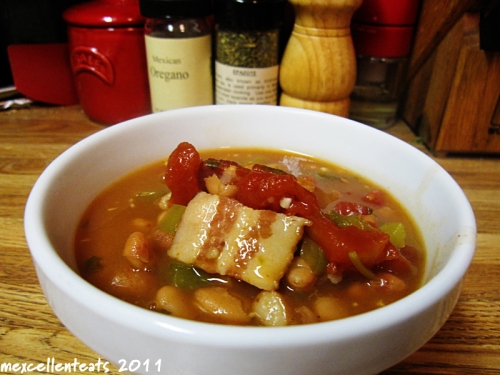
But man cannot live by tacos alone (or can he?  That’s debatable).  To round out our dinner, I fixed a pot of borracho beans, in the style of a local joint we frequent whose beans are off the chain.  Borracho is the Spanish word for “drunk,” and these beans are so named because you add a bottle of beer to them as they cook.  Of course the alcohol cooks out during the cooking process, so no drunkenness ensues.  Be sure you choose a good quality beer for this, as you really don’t want skunky beer flavoring your pot of beans!

Borracho beans: easy to make, filling to eat, full of veggies and...bacon. Which you can leave out if you like, but which does add flavor.

So I’ll cut to the chase and tell you how I made this evening’s dinner.  You will need:

For the tacos:

  • about 1 1/2 cups chopped brisket
  • 4 tortillas
  • Garnishes:  lime wedges, shredded cheese of your choice, salsa, avocado slices, cilantro, chopped onion…you get the idea

Warm the brisket in the microwave.  While the brisket is warming, heat your tortillas either in a skillet on the stove, or you can go all Mexicano and do it on the stove eye, like I do.  Just don’t burn yourself.  Once your tortillas are warm, stuff each taco with about a half cup or so of brisket and garnish as desired.

For the beans:

  • 1 pound dry pinto beans, rinsed and sorted (basically, make sure there are no rocks)
  • 3 tablespoons ham base*
  • 1 cup chopped green bell pepper
  • 2 cans diced stewed tomatoes
  • 4 tablespoons minced garlic
  • 1 large jalapeno pepper, sliced (remove the seeds if you want less heat)
  • 2 slices bacon, cut into lardons
  • 1 12-ounce bottle lager style Mexican beer, like Corona
  • 1 cup chopped cilantro
  • 2 tablespoons Mexican oregano (it has a more intense flavor than Mediterranean oregano, found in Greek cuisine)
  • 2 teaspoons ground black pepper
  • hot water

*If you do not have ham base available to you or cannot consume pork products, you may substitute chicken stock and leave out the bacon.  To make this completely vegetarian, use vegetable stock.

Once you have rinsed and sorted your beans, place them into a large pot (like a 5 or 6 quart Dutch oven) and cover them with hot water so that the water is 2″ above the beans.  Cover the beans and put them on a stove set to medium-high heat.  Bring the beans to a boil, and then add the ham base.  Stir thoroughly so that the ham base dissolves in the liquid, then reduce the heat to medium-low and allow the beans to cook for 90 minutes, stirring periodically so that they do not stick to the bottom of the pan.  Once the 90 minutes has passed, add the remaining ingredients and stir to combine.  Allow the soup to cook for an additional 60-90 minutes.  At the end of the cooking time, use a potato masher to mash the beans up slightly so that your soup is thickened a bit.  Serve while piping hot.

To reduce the heat, you may omit the jalapeno.  Our beans turned out to be quite spicy, but really good!  The pot makes about 10 1 1/2 cup servings.

Best. Vanilla. Extract. EVER.


Vanilla:  we add it to ice cream, cookies, cakes and other sweet treats and probably don’t give much thought as to its origin.  Vanilla extract is made by steeping the dried fruits of the Vanilla planifolia, an orchid native to Mexico, in alcohol.  This process extracts the aromatic oils of the fruit, which dissolve readily in the alcohol, as both oils and alcohol share the property of being nonpolar.  Most vanilla is actually cultivated in Madagascar, and thus the bees that the flower depends on to pollinate it do not live there.  As a result, production of vanilla is quite a labor-intensive process, as the flowers must be pollinated by hand and the fruits must be gently hand-picked.

If you’re a baker, you know that a quality vanilla extract costs a pretty penny for not a whole heck of a lot of vanilla.  When I say quality here, I mean real vanilla extract, not that vanilla flavored extract, which is likely made from vanillin gotten from the plant protein lignin.  While that stuff tastes like vanilla, it isn’t vanilla and quite honestly, should be avoided as it just doesn’t taste the same.

A while back, I decided to make my own extract.  It can’t be that hard, I thought.  And it isn’t!  I will also say that I will never again buy vanilla extract in the grocery store, because it’s not nearly as good as the kind I can make myself.  A bit of patience is required as the completion of the process takes a year or more, but as you will see below, it’s totally worth it.

Madagascar vanilla beans...the beginning of any good vanilla extract!

Here’s how I do it.  You will need:

Homemade vanilla extract is easy to make and pretty economical, especially if you go through a lot of it.

All you need for a mess of homemade vanilla!

  • 1 750 mL bottle of Everclear or Absolut vodka (the difference is in the alcohol content:  190 proof vs. 80 proof)
  • 15 vanilla beans (I used Madagascar vanilla beans; Mexican vanilla beans would also work here)

Pour off about 1/4 cup of the liquor as you will need to make room in the bottle for the split vanilla beans.  Using a sharp knife, split the vanilla pods so that the seeds are exposed, and drop them into the bottle of alcohol.  If you have room, pour the alcohol you removed back into the bottle and cap the bottle tightly.  Store the bottle in a cool, dark place for a minimum of 1 year.

Here's what you'll start with--beans and booze.

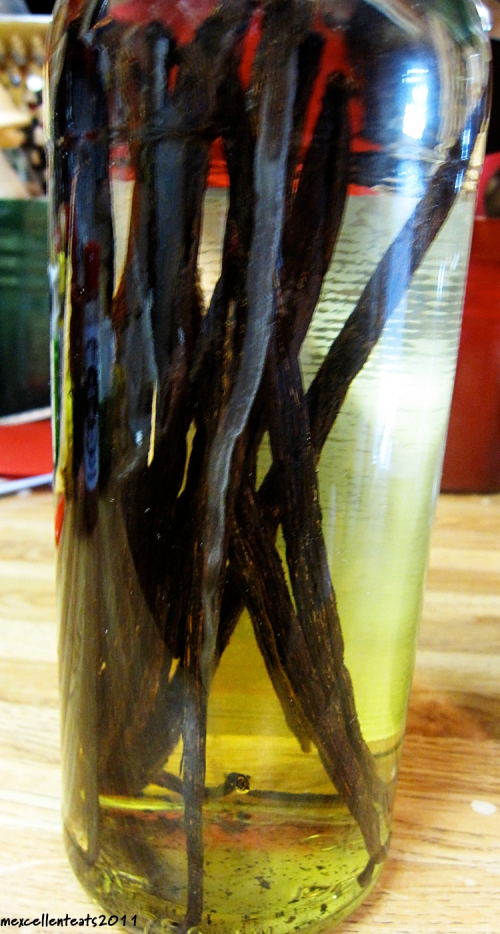
Put this away in a cool, dark place and don’t bother it.  You need to give the alcohol time to fully extract as much oil from those beans as possible.  After about a year, your bottle will look like this:


See that dark yumminess in the bottom there? That's gold, people!

The bottle above is the first bottle of extract I made using vodka, about 5 years ago.  It is truly the best vanilla I have ever used!  It is quite potent, and thus, I use less of it since the flavor is nice and concentrated. I’m hopeful that what’s left in this bottle will last until this time next year so that I can crack open the bottle I just started.  I’m pretty sure that I won’t have to buy vanilla for a very, very long time again once the new bottle is ready.

Patience pays off with this one, folks.  And it is well worth the time and money spent, especially if you bake a great deal.  I am also told by SB that this vanilla adds a nice kick to a White Russian.

Mushrooms in Creamy Bourbon Sauce


Earlier this week, I posted the recipe for the beef tenderloin I fixed SB and myself for Valentine’s Day.  The accompanying photo, seen here:

A creamy mushroom sauce with a hint of bourbon on the tenderloin sends it over the top with flavor.

shows some lovely Cremini mushrooms draped over the top of the luscious rare tenderloin.  Sweet Baboo is a big fan of fungi, and while I am not, I am always glad to make him sauteed mushrooms of some sort whenever we have steaks.  This time, I didn’t want to make the run of the mill sauteed mushrooms, though.  I wanted this to be a bit more elegant and flavorful; after all, we were eating tenderloin, which is not an every day occurrence in our household.

I happened to pick up some Cremini mushrooms at Central Market when I did the shopping for this meal, but really, any sort of button mushroom would do here.  I also used half and half to cut the fat slightly, but unfortunately I think the butter I added just put it right back in!  The bourbon I used was Knob Creek, but you can use any bourbon you have.

Here’s how I did it.  You will need:

  • 1 1/2 cups sliced mushrooms
  • 1/2 cup half and half (for a richer sauce, use heavy cream)
  • 1 tablespoon butter
  • 1 tablespoon bourbon
  • salt to taste
  • fresh ground black pepper

Melt the butter in a skillet on medium-high heat and then saute the mushrooms in it.  Sprinkle a bit of salt on them during this part of the cooking process so that they release a bit of their liquid.  Once the mushrooms have released a bit of their liquid and are starting to brown, pour the bourbon in the pan to deglaze it, and stir the mushrooms around carefully to wet them with the liquor.  Once the mushrooms have been sufficiently flavored by the bourbon, add the half and half, and stir until thoroughly mixed.  Allow the mixture to bubble and then remove from the heat.  Feel free to add in some fresh ground black pepper.  Serve immediately over steaks or any other favorite meat.

This recipe served one very hungry husband, who thoroughly enjoyed the ‘shrooms as an accompaniment to a tasty rare beef tenderloin.

Bourbon-braised Short Ribs with Savory Cheddar-Thyme Polenta


If you aren’t fully aware (or living in a cave), the majority of the country is buried under some form of frozen precipitation, our part of Texas included.  Needless to say, with a couple of inches of solid ice on the ground, neither I or Sweet Baboo had to go off to school today.  I was supposed to be off work today anyhow, as I had scheduled a doctor’s appointment, but the weather closed her office down too.   I’d decided over the weekend that since I was going to be home today anyhow, that I’d make the short ribs I bought a couple of weeks ago that were sitting in the freezer.  Since we were iced in today and travel was going to be damned near impossible, it was a good opportunity to get some cooking done that I don’t normally get to do during the week when school is in session.

Enter the bourbon-braised short ribs:

These bourbon braised short ribs made for a perfect cold weather dinner. The bourbon adds a nice flavor to the pot liquor that warms you to your toes.

I’d been wanting to make short ribs for quite some time, especially since I saw this recipe over at Pioneer Woman’s blog.  However, I didn’t have any red wine in the house, nor did I have shallots (not that it matters; can’t use them anyway).  So I did a bit of research to get a general idea of how braised short ribs should be made, and came up with my own version.  And the verdict:  they were absolutely luscious, rich and oh so good!  I served my ribs atop a bed of cheddar-thyme polenta, which was an excellent accompaniment.  Mashed potatoes would also be good here.

Here’s how I did it.  You will need:

  • 6 meaty beef short ribs (the meatier, the better); about 2 pounds
  • 6 cups beef stock
  • 1 cup good bourbon (I used Knob Creek)
  • 2 tablespoons extra virgin olive oil
  • 2 cups diced celery
  • 1 cup diced carrots, plus 2 cups whole baby-cut carrots
  • 1 tablespoon minced garlic
  • 2 tablespoons fresh thyme (chopped), plus 4 sprigs fresh thyme
  • 2 teaspoons kosher salt
  • 2 teaspoons coarse grind black pepper (or use freshly ground)
  • 1 teaspoon granulated garlic

Before you begin cooking, set the short ribs out on the countertop to allow them to come to room temperature.  This helps them to cook more evenly when you are browning them.

Once your ribs have come to room temperature, pat them dry with a paper towel to remove any excess moisture.  This aids in the browning process (thanks Julia Child!).  Sprinkle them with the salt and pepper.

In a large Dutch oven, heat the olive oil.  Once it is hot, carefully add the ribs to the pot, but do not crowd them.  You want to brown them on the meaty sides of the ribs, about 2 or 3 minutes or so on each side, until they have a lovely brown color.  If your ribs do not fit, then perform this step in batches so that the meat does not crowd the pan.  Remove the ribs from the pan to a bowl for the time being.

Preheat your oven to 350 degrees F.

Once you have browned the meat, deglaze the pot with the cup of bourbon.  If you have a gas stove, be careful at this step!  You will be met with a cloud of bourbony goodness.  Stir the browned bits on the bottom of the pot, and then add the garlic, chopped thyme, celery and carrots to the pot.  Give them a quick saute, about 3 minutes or so, enough to coat the veggies with the little sauce you’ve just made.

Add the ribs back to the pot, standing them up in the vegetables.  Pour the beef broth over the contents of the pot.  Toss the sprigs of thyme on top and carefully stir in the granulated garlic.  Cover the pot tightly with the lid, and place in the oven for 3 to 3 1/2 hours.

The greatest thing about this is that you put it in the oven, and walk away.

As for the polenta, that was easy to make too.  You need:

  • 1 cup polenta (or cornmeal)
  • 3 cups water
  • 1 teaspoon salt
  • 1 tablespoon butter
  • 1/2 cup cheddar cheese
  • 1 tablespoon shredded Parmigiano Reggiano
  • 2 teaspoons chopped fresh thyme

In a large saucepan, bring 3 cups of water to a boil.  Add the salt, and slowly pour the polenta into the boiling water in a steady stream, whisking it in.  Once all the polenta has been added and incorporated into the water, turn the heat down to low.  Allow this to cook over low heat, stirring frequently for 15-20 minutes.  When the polenta is cooked, stir in the butter until it melts, and then stir in the cheeses and thyme until evenly distributed and melted through.

The short ribs recipe makes enough for 3 people to have two short ribs apiece, plus veggies.  The polenta recipe makes about 6 cups, so there may be leftovers.